This is the first Day since July 28th of last year that I am off and he is not. It is weird.
However, I spent some time in our new POOL!
Don't get too excited. It is mini, even for me. But it does help to beat the heat! It is 97 today!


 Not only does it look nice, it definately helped keep the temperature upstairs down.
 This is the second time I have done used this idea. The other was in college. The top one holds tons of beads and buttons and crafty stuff. The second one holds extra bed sheets and pillowcases for the guest bedroom. And the third one holds electrical cords, chargers, and all other things that plug into the wall.


 I first cut out circles for each lid. Then I modpodge-ed them together. Each one came out different and unique.
 Let them dry and you have cute storage for all those little things-beads, paperclips, thumbtacks, spools of thread, screws, etc.
 Free, cute storage! I knew there was a reason to save them. These will probably make it into my craft closet as storage.
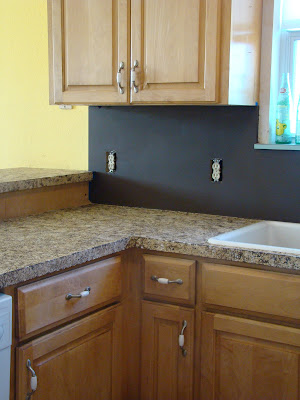
The idea to paint my counter tops first came from the blog world. I had seen many success stories and lots of tutorials. I will admit that I did not follow any one exactly. I mixed methods and made some up as I went along so please feel free to do the same.
Materials:
The very first step was choosing the “granite” color. I did this by going to the home improvement store and scouting out their granite sample chips. I took some home and decided which one I liked. Then, I really, really looked hard and wrote down all the colors I saw. Then I matched them with paint chips. I chose four colors: tan, dark tan, brown and white. The paint guy recommended I used a mixture of glossy and satin finish. Both are easy to clean.
At home:
Hint: to same money and time, I used a tip that my dad taught me for painting. I put grocery bags over my paint tray so that it is easy to go from one color to the other without cleaning it out every time.
*beware, it can smell up the house so do not do this if you are hosting a party, or in my case,Thanksgiving.
This is what gives it shine and protection.
I went with Minwax Satin Polyurethane.  It was so simple. I just used a roller sponge brush. And put three coats on allowing it to try between coats. Three may sound like a lot but it was NOT enough.…I would do 5 if you are able.
This process took me about 5 days. The whole thing cost me about $30.

This is the picture of the finished product. I painted the cabinets too. That's another post for another day :)
If you decide to do it, let me know how it goes. Email me or comment if you have questions along the way. Good luck!
Teacup candle


I have seen this project done lots of times but the hardest part was deciding what to put on it. I knew where it would be hung so I went simple.

Since I gave it to her early, she was able to put it out for the mother's day party that the men in our family hosted at her house.
Personalized gifts are the best!


My first thought was to paint the letters on but that is sooooo time consuming! I wondered through Home Depot looking for other options. Then I ran across contact paper. It is used to line shelves with. It is my new favorite tool!
There are a couple of awesome things about contact paper:
1. you can draw right on it with a pencil and erase if you have to.
2. There is a grid on the back for keeping things straight
3. It is not permanent. Once you place it down, you can pick it up and move it if you have to!
4. It comes with 25 sq.ft!
I drew the letters on, cut them out, put them on and voila! A SCRABBLE tile!

Let me know if you try it!
If that is not your thing, they are on my ETSY store, too.
All my readers 25%off ! Use coupon code est2009
featured at: