Saturday, April 30, 2011

Backwards crafting

Have you ever made something for no reason? Have you ever seen something and thought "I want to do that" and then you JUST DO IT! Have you ever stopped in the middle of something to think "what am I going to do with this?" . I call that crafting backwards!

I try not to but sometimes I cannot help it, especially when it costs nothing. Recently that has been the trend around here (GROW sign, garden markers)

Well this project all started with me cleaning out my craft closet. There was soooo many fabric pieces lying around. Later while blogging, I ran into yet another fabric banner and I knew that this was the project that would save me from my fabric mess! So I made not one, not two, but THREE!

For a quick tutorial:
1. First, I made a 12" triangle template from cardstock.
2. Then I took a bunch of scraps and cut out triangles until my heart was content.
3. When that was done, I put two triangles with the patterns touching and sewed two of the three edges together and ironed them. They should look like this.


4. I seprated the triangles so that I had three banners with 10-12 triangles each.
5. Then I grabbed some quilt binding left over from last time. However, for I needed two so I guess it did cost $2.76. I would recommend using double fold quilt binding as pictured below. This way, you do not have to iron or make hems.


6. I spaced out the triangles 4" apart between the binding and just sewed a line all the way down.The 4" is totally just my preference. I figured it would be a longer banner this way.


7. Then, I had to figure out what to do with them.

I decided on using one that matched our new chairs on the patio. And it was JUST the right size...its nice when things work out!


It makes me smile every time I see it and the MR. said that he feels like he is coming home to a party everyday.

Plus, no more fabric scraps!

Tuesday, April 26, 2011

Unique Easter tutorial

This year we spent Easter with the San Antonio Family! Lots of hugs, food, and fun.
We spent time relaxing.

We made cascarones this year. These are "the best of".

If you have never made cascarones here is a quick tutorial.
1. buy eggs.
2. carefully crack only the tops of the eggs as shown above.
3. color eggs using dye kits found in stores.
4. cut out circles of tissue paper.
5. fill eggs with confetti......or glitter.....or FLOUR if your crazy like that!
6. glue tissue paper to eggs to cover the hole.
7. Celebrate by cracking eggs on the head of someone on Easter!

These can also be bought for less than $2.00 at the grocery store, but what fun would that be?

Hope your easter was a celebration, too!


Monday, April 25, 2011

First Giveaway!

As promised, I am starting off this week with a FREE giveaway.
All followers are invited. If you would like to be put in the running for my FIRST giveaway, all you have to do is comment on this post with your favorite color below. Each entry will be put in a drawing and and one randomly chosen. Come back on Wednesday to see if you are the winner! It is that easy!

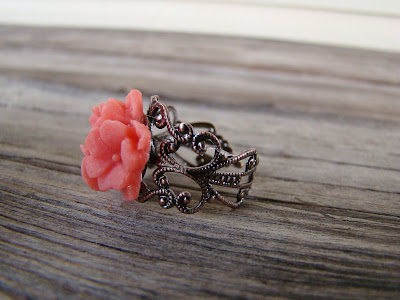
In the spirit of Spring, I am giving away a vintage inspired garden ring!
(also sold at my etsy store)
Colors: blush blue, soft purple, peachy, and coral

Here are some close ups:


Good Luck!


Thursday, April 21, 2011

READER CHALLENGE!!

I Need You

To invite a friend!


So here is my big idea for this blog.... I want it to be an interactive decorating opportunity for EVERYONE!


For all home renovation projects I would love to have your input....more like your vote!

I would give you three choices to choose from and my readers would vote on which one they like best. And the best part is that I have to use/buy/do whatever option wins!


For example:


Lets just say that I was looking for a new shower curtain, I would give some background information (the walls are white with a spa blue wainscoating, all cabinets are white and we are going for the fresh, clean look) and then post three pictures of your options.


A) Pebbles


B) Floral
C) Tuxedo


Then you would vote...go ahead and try. All you have to do is leave a comment with your choice


Paint colors, art prints, fabric choices, curtains, anything! There are not limits to your participation.

HOWEVER, I CANNOT BEGIN UNTIL I HAVE MORE FOLLOWERS....AS IN 100 FOLLOWERS!!! I HAVE 20 NOW.


So if you are interested in this little project, ask your friends and followers to be mine too!


To help get things rolling, I will begin with a giveaway on Monday. See you then


Tuesday, April 19, 2011

TO DO LIST

we have a small house but it is forever changing. we have done ALOT in less than two years but there is still of list of things to do

-Finish the upstairs bathroom floor
- Add crown moulding
- replace tile floors
- paint bedroom doors
- put up towel bar in bathroom
- figure out how to decorate the stairway
- wallpaper the inside of the kitchen cabinets :)
- add beadboard to the front of the bar
- redo the fireplace wall and mantle

That is what is on my list...today.

I have these grand plans for this house and this blog BUT it requires your help. I will post more details on this later.

Thursday, April 14, 2011

happy 25th Birthday Neil!

We spent the afternoon celebrating the birthday of a great man!
He turned 25 today and we celebrated this afternoon.
We started with a pizza dinner then moved on to his birthday game.

The theme of this birthday was his love for BOOKS!
I set up a scavenger hunt game which relied on his memory of book quotes as well as riddles.
Here are a few of the riddles...try your hand at it.

(answer: music book)

(answer: Bible - this is our marriage verse)

(answer: DICTIONARY!)

That was just a few. There were about 20 clues in all. I am proud to say that I did stump him but it was all in fun.
They lead up to his birthday gift....

A Kindle! Doesn't he look happy?

For his birthday dinner, he chose pizza and finished with cake.
I made his favorite, angel food cake, which was an experience...and decorated it as the "lego guy" in memory of his childhood :)

Tuesday, April 12, 2011

Garden markers

Thanks to Mrs. Martha Stewart I have found a free way to mark my garden. I mostly rely on memory which works well for the garden bed but for seeding, that NEVER works!

While browsing marthastewart.com I found this free cheap idea.
First grab some good lookin' sticks :) I have TONS on my 1.5 acres!

The directions say to use a peeler but I just used an old ($store) kitchen knife. You cut a couple of layers off the top. It should look something like this.

Next you get a sharpie and write your vegetables, plants, herbs etc. I only have veggies :)


I sprayed a clear coat on top to protect from the elements but I am not sure you have to do that step.

The entire process took literally, 5 minutes. Of course, it was FREE so nothing beats that but I like the organic natural feel.

happy planting

Featured on:
Photobucket

Tuesday, April 5, 2011

Bathroom reading

Trying to make every room in the house feel fresh and new for spring is exciting. The bathroom has gotten a mini makeover.
I added another quick art project that can serve as bathroom reading as well.

Here is the temporary set up. I chose this location for the viewing pleasure of the
Man of the House.

The upper print is an original print from Baja Whitethorn, a Native American artist that my dad collects. The lower one is my newest creation. Here is a close up.

It is simply a piece of paper printed and inserted into a frame. The frame was too big so I added a faux matte.

It is such a fun piece and since we visit this room EVERYDAY,
its the perfect place to get a little love in.
It was meant to serve as a constant yet ever changing love note to Neil, but as you can see, he got in on the action too. :)


Monday, April 4, 2011

Small House Art

Don't you love it when you find something that suits you perfectly?
I ran across these cute art prints on ETSY and they totally resonated with me.

I especially like this one cause its exactly how I feel.
The thing about small houses is that there is not a lot of room to put cute prints like this up :) However, if I find a place for one, I may make one of my own.

Saturday, April 2, 2011

A first

I was featured on another blog....for the first time.

UPDATE: I just found out a second "real" blog featured me
Click these buttons to see!

WhisperWood Cottage

craft


I follow both WhisperWood Cottage and C.R.A.F.T and they always have great ideas. So excited to be on a "real" blog.

Newest addition

Not much to show but its cute enough.

I had everything lying around and it is filled with memories.
The white dish - our wedding "china"
The flowers - came from our first apartment together
The two bottles - Commemorative Dr. Pepper bottles for Baylor Cotton Bowl in 1974
Small red pitcher - engagement gift